Category Archives: Technology

Anything related to the field of Technology that I write, be it PCMR, Windows, Ubuntu, Android, Website development, my gadgets, you will find all linked here. Occasionally I also write about my general view on how I use technology to my advantage. Feel free to ask me any questions in comments.

Shopping for and Assembling a new desktop PC

What’s a guitarist without his guitar? What’s a painter without his colours? What’s a sailor without a boat? What’s an IT professional without a desktop PC? Answer is common,  “nothing much!”. Hence when one of my friend finally decided to get a PC assembled I was very happy for him. I thought to help him out before other priorities gets hold of him and he changes his mind.
Before, he use to work either on his age old Celeron laptop or on my computer. He use to play games and watch movies on weekends with me. But now that he finally decided to get his own PC, I had a reason to get my geeky hands dirty in assembling a new PC. There’s some kind of charm in shopping for PC components and then putting them together in one coherent piece so that we can then appreciate the modern advancement, human beings now take for granted.

The Research:

I started my research by studying many of the rig suggestions by fellow members on digit forum and also the suggestions put up in digit magazine. After analyzing my friend’s requirements and the suggestions on forum we decided to go with following components:

Component Model
Monitor AOC 21.5 inch LED Backlit LCD – i2269Vwm Monitor / I2279VWHE / i2267Fwh
LG 21.5 inch LED Backlit LCD – 22MP56HQ Monitor
Processor Intel 3.4 GHz LGA 1150 i3 4130
Intel 3.5 GHz LGA 1150 i3-4150 (BX80646I34150)
Motherboard MSI B85M-G43 Motherboard
Gigabyte GA-B85-D3H Motherboard
HDD WD Blue WD10EZEX 1 TB Internal Hard Drive
RAM Corsair Vengeance DDR3 4 GB (1 x 4 GB) PC DRAM (CMZ4GX3M1A1600C9)
Corsair Vengeance DDR3 8 GB (1 x 8 GB) PC DRAM (CMZ8GX3M1A1600C10)
Cabinet Antec VSK 4000B U3 New Solution Series Cabinet
PSU Antec VP450P I 450 Watts PSU
Optical Drive Samsung DVD Combo
Keyboard Logitech MK200 USB Standard Keyboard
UPS APC 600VA
Router TP-LINK TL-WR841N

As can be noticed, some of the components had two or more choices in them, arranged by priority. After spending considerable amount of time in researching the prices (in offline and online markets) we finally decided to go to “Nehru Place” to see if we can get good deals in the biggest computer hardware market of Asia.
Continue reading Shopping for and Assembling a new desktop PC

Upgrading to Windows 10, the Microsoft's Comeback

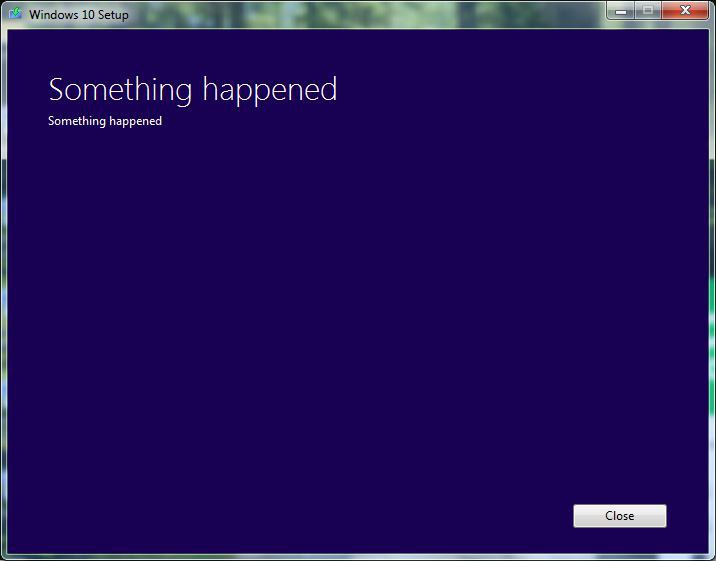
Something Happened.. Classic Microsoft
Yup. That’s what happens, when something happens. Classic Microsoft

Its been a few days that Windows 10 started rolling out to general public. Even people who never saw past XP seemed to be excited about the new Windows 10.
Windows 8 wasn’t a soaring success even for the fans of Windows. Though its predecessor Windows 7 was a leap ahead from the good old XP, the tile interfaced Win 8 proved to be too much of a change. Start Menu had disappeared. It took the users by storm and Windows 8 was rejected by almost everyone, including myself. That’s why Windows 10 is so important for Microsoft. And maybe that’s why Microsoft decided to roll out a free upgrade for anyone who have a genuine license of Win 7 or Win 8.1.
Now people, all over the Internet are exploding with enough queries and concerns to overwhelm Microsoft. People are perplexed, furious and amazed with their own experience of upgrading. While everyone is jumping into the bandwagon of the latest operating system, failed downloads and bugs are putting many users off.
It all began on 29th July 2015. People who had registered for the update got a prompt that Windows 10 is now available and that they can install it after Windows finishes downloading the update files. I got a prompt too and I allowed the update to download.
Windows 10 downloading

Continue reading Upgrading to Windows 10, the Microsoft's Comeback

YU Yuphoria Review

I got the opportunity to get my hands on a new YU Yuphoria phone last week. Following are my observations and review first hand.
YU Yuphoria released in the May 2015 as a successor to the phone Yu Yureka which was released in Jan 2015 by Micromax. YU Yureka was the first phone released under the YU tag. At the price point of Rs 8,999, Yureka provided many features to be found in only high end phones. Yuphoria, released after a few months is kind of a down scaled version of the Yureka but have its own strengths to boast on.

Hardware

YU Yuphoria
YU Yuphoria

As a owner of Moto X (1st gen), the specs of Yuphoria baffled me initially. Yuphoria had similar specs as that of Moto X 1s gen but cost only Rs 6,999. That’s 3.5 times less price than that of Moto X 1st gen with similar features. Lets see the specs at a glance.
Yuphoria is a 4G phone with 5 inch screen size, have a layer of Gorilla glass 3 and sports a pixel density of 294 ppi with its 720p resolution. It’s powered with Snapdragon 410, Quad-core 1.2 GHz Cortex-A53 chipset which contains graphics capability of Adreno 306. Snapdragon is Qualcomm’s first 64 bit SOC. In terms of storage it comes with an internal memory of 16 GB (of course less for actual use) but is expandable to 32 GB. The phone contains 2 gigs of RAM enough to never let you go out of memory when playing high end games (for a couple of years at least).
Yuphoria Back
Yuphoria Back

It’s 8 mp primary camera have autofocus, flash and can shoot up to 1080p video. It can snap upto 3264 x 2448 pixels in image resolution. The front cam is 5 mp and seems impressive. The phone is supplied power through a 2230 mAh Li-Ion battery, which boasts of upto 160 hr of standby time on 3G, and 7 hrs of talktime. Continue reading YU Yuphoria Review

Auto Mounting Drives in Ubuntu

If you are using Ubuntu in dual mode with Windows you must be having a few partition that are NTFS. By default these NTFS drives are not auto mounted. So while you have the partitions, you won’t be able to access them if you don’t mount it.
As you already may know that in Ubuntu (and Linux in general) there are no drives. Combine it with the fact that the root directory starts from a forward slash (/). Every drive in Linux is ‘mounted‘. So when you insert a DVD disk the content of the disk may be mounted to a directory /media/username/DvdLabel. Here DvdLabel is the name of the mounted directory which was taken from the label of the disk.
Similarly if you have a partition with the label, say, Documents when you click the Documents partition, it is then that the Documents partition (or drive) is mounted to /media/Documents.
By default Ubuntu doesn’t mount the partitions when it starts. You have to click the partition in Nautilus (or Files, the file explorer) once so that it can be mounted. This can be irritating since when an application starts which requires a partition they will result in error. Eg, if you have set dropbox to sync to files to Documents drive or Transmission to download files to Multimedia drive.
You can make these NTFS drives automount with Ubuntu by various method as described in this page. But its a long and complicated read. So here is the method explained simply.

Find out Label and UUID

First you need to know the exact Labels and UUID of the drives. Consider UUID (Universally Unique Identifier) as a unique identifier for the drive which will never change (unless you format the drive, re-partition it, or manually change it). To know the Label and UUID you need to use the command blkid command. This command when used with sudo will give you a list of all the partitions along with its Label and UUID. Like below:

vyom@VyomNix:~$ sudo blkid
[sudo] password for vyom:
/dev/sr0: LABEL="Alpha_0515" TYPE="udf"
/dev/sda1: UUID="30986b83-1234-4eeb-a30a-482223df145f" TYPE="ext4"
/dev/sda2: LABEL="WinServer" UUID="3F1234AB1233423C" TYPE="ntfs"
/dev/sda3: LABEL="Recovery" UUID="A12345E12345AF1B" TYPE="ntfs"
/dev/sda4: UUID="0659-9A568" TYPE="vfat"
/dev/sda6: UUID="b1234321-ad5f-4ddd-89ac-eed1234c56c7" TYPE="swap"
/dev/sda7: LABEL="Digital" UUID="33FA6E12GA6DF687" TYPE="ntfs"
/dev/sda9: LABEL="Entertainment" UUID="123FHE3E3N98BF65" TYPE="ntfs"
/dev/sda10: LABEL="Documents" UUID="37MME50B21B7C65B" TYPE="ntfs"
/dev/sda11: LABEL="Spare1" UUID="654EF123456CAF7E" TYPE="ntfs"
/dev/sda12: LABEL="Spare2" UUID="68D774EB5DBFPOOI" TYPE="ntfs"
vyom@VyomNix:~$

Continue reading Auto Mounting Drives in Ubuntu

Creating a Startup Application Script in Ubuntu

If you are new to Ubuntu and have installed various softwares, eventually there comes a time when you want the applications to start automatically just after the system boots.
Following are two ways to add applications to startup list. First is Windows method, while the second method is geeky way (as you must have guessed, it’s my favourite).

Easy method

Just like Windows have a startup folder where you can place shortcut files and which would let you start the applications when user logs in, in Ubuntu there is a ~/.config/autostart folder where you can place the shortcut files. (Just to recall ~/ is your home folder. So ~/.config = /home/username/.config).
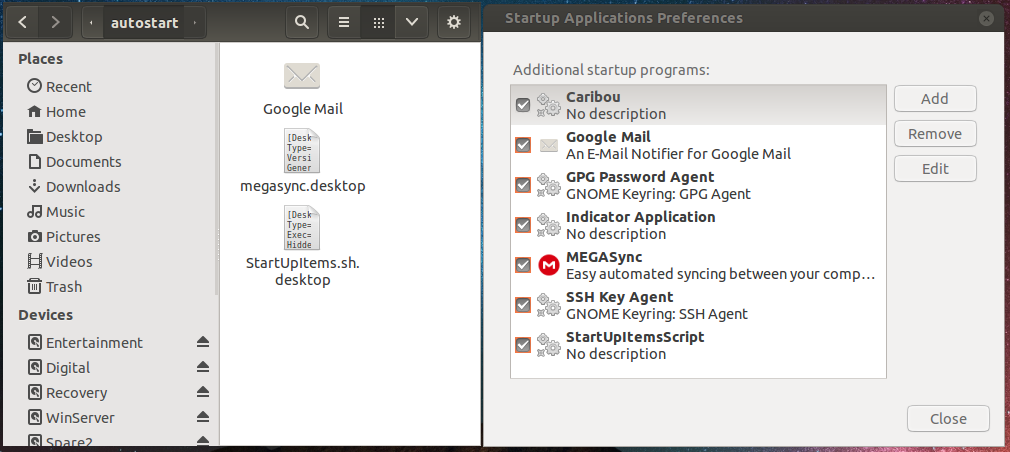
You can also use the Startup Applications tool (ships inbuilt with Ubuntu) which lets you add startup applications to that folder. Shortcut files in Ubuntu are files which ends with .desktop. The folder where you can find most of the .desktop files is /usr/share/applications. So you can just find the desktop file related to the particular application and copy the .desktop file into the ~/.config/autostart folder.
If you want to start the application for every user then you would need to copy the .desktop file in /etc/xdg/autostart folder.

Starup Applications Folder and Tool
Autostart Folder on the left and Startup Applications Tool on the right

Continue reading Creating a Startup Application Script in Ubuntu

How Ubuntu screwed me over and why I still love it

As humans, memories have a special place in our heart. Nothing can prepare us if something goes wrong and god forbid you lose them. It’s hard but imagine losing months of snaps that you shot over the trips you made across city or continent, documents accumulated over the course of your research on some project, also those rare songs and movies you got your hands on. It could be a frustrating experience if you didn’t have a backup of the data you lost.
Something like that happened with me over the last week. I was playing with Ubuntu Operating System from last few months but in a virtual environment. On one fine weekend I thought I am ready to finally install Ubuntu 14.04 LTS on a dedicated partition and to use it as my primary OS. I created a bootable USB and rebooted PC. Ubuntu asked me if I want to “Replace the OLD Ubuntu” with the new one. I thought, “Ok, Cool, sure do. I don’t need old Ubuntu”. And it did remove old Ubuntu and nicely completed the rest of the installation.
When the Unity desktop showed up, it was all too familiar since I have been working on it for quite some time. Except when I tried to watch an episode of “The Flash” kept on my Multimedia drive. I couldn’t find it. I was like, “Why isn’t my other drives showing up? Are those not mounted?”. I was use to unusual things over my time with playing Ubuntu in virtual environment. But nothing could prepare me for what lay ahead. It was when I opened the “Disks” application that the reality hit me hard. Ubuntu had not only replaced old Ubuntu, but it had also wiped the existence of every other partition and the data along with it while installing itself.
Do you know that feeling? At first you feel numb. You think, “WTH just happened?“. The denial phase, “No, it can’t be happening”. Then the shock overtakes you. “NOOO, MY DATA!”. It soon turns into rage, “WTF Ubuntu, HOW CAN YOU DO THIS?”. You try to remember,“Did I do something wrong?”. Then you realize you didn’t. You just selected the automated install as opposed to let you choose your own partition. It’s then when you realize you DID made a huge mistake by choosing the automated install. Finally, you try to remember when was the last time you did a backup. Eyes wide open, “It was long time ago!“.
I had backed up my data about 3-4 months before. 3-4 months was a long time. A lot had happened since then. “I must have my data back”, I thought with a determined look in my face. The following week I used my secondary PC to recover the data back from the HDD using application known as MiniTool Power Recovery. It took it’s time. Juggling day job in the morning I only had nights to work on the recovery. Complete night to scan for partitions and data. Next two nights to actually recover the data. Another night to make sure I had not left anything else.
As I found out later that Ubuntu wiping out whole of the physical HDD and all its partitions without so much so as a warning “You are going to loose ALL YOUR DATA”, was actually a bug in the version I was using: 14.04.1. This bug was discovered about a year ago and all it required to fix it was probably just to reword the statement “Replace Old Ubuntu” with something like, “All your disk is going to be wiped out. Please make sure you are not installing this OS while drunk”. Let me tell you, that would have made a lot of difference. Had Ubuntu said something like that, I could have chosen the custom install instead. This bug was recently fixed in the update 14.04.2 but only after making a lot of people who trusted “automated install” to get pissed in the process.
Anyway, what happened couldn’t be roll backed. But I did manage to recover all my data. Though all the software that I had accumulated as giveaways were lost, along with all the customization that I had on my Windows Server 2008 R2 OS, but those can be acquired again.
This incident taught me quite a few important lessons. Of course the first one is not to trust “Automated installations”, especially when it comes to installing a complete OS. Other was to keep regular backups. Importance of cloud backup is especially important considering that it happens automatically once you set it up.
Let’s see what things I had already backed up. I had all my:

  • Documents backed up to Dropbox,
  • Firefox Add-Ons/Passwords backed up via Firefox Cloud,
  • Firefox Speed Dials backed by via EverSync cloud backup,
  • Other Multimedia related stuff like, Movies and Pictures (until last year) backed up to external HDD.

So, the recovery program allowed me to recover all the data that was not synced to the cloud, and which probably couldn’t be synced either since those were very large files (especially with the kind of quality of Internet that we get in our country).
With recent accident of unlocking my phone’s bootloader without taking backup, this incident of wiping my PC off, April has been one hell of a month. And it’s not over yet. So I will try not to bite more than I could chew for the rest of the month.
In the end, Ubuntu did screw me over but it was mostly my fault. I takeaway a lot from this experience. Had I not faced it, I would probably be less careful while experimenting on Ubuntu. And that’s why I have started to like Ubuntu even more for it taught me that software isn’t perfect. To always have a backup plan is probably the best way to keep yourself and your data, out of harm’s way.
Concept of Installing Applications in Ubuntu

Until now we have discussed how to install Ubuntu, concepts around files, keyboard shortcuts to navigate easily and various ways to customize Ubuntu with Gnome shell. Today I am going to discuss how to install applications in Linux along with the various ways to do them, and will end with a special note that would explain how “running” applications in Ubuntu is fundamentally different than Windows.
You must be used to installing softwares in Windows by downloading .EXE files or .MSI installers. You open these files and click Next -> Next and viola. Installing applications in Ubuntu is a bit different and safer than Windows in some cases. But before we get into the steps its important to understand the concept of Packages in Ubuntu.

What is a Package?

A package can be considered a collection of files bundled into a single file. Package contains among other things, the installation script which tells where the files will be copied and what settings needs to be changed once the package is installed.
In essence, the output of a package is equivalent to .exe or .msi installers, that is they install a software on the OS. There are many ways to install a package on Linux. You can install a package using Package manager which itself are categorized in Low-Level and High-Level package managers. You can also download packages over the Internet and use it to install it on the system (more on this later in this article).
Low level package managers are dpkg (for Debian based Linux like Ubuntu) and rpm (for SUSE and Fedora). While high level package managers are apt-get (for Debian), zypper (for SUSE) and yum (for Fedora).
Packages can depend on other package to be installed first. Say if you want to install some software which was written in PHP, you may need to install the PHP package first. This concept is called dependency and is usually taken care of itself if you are using a high level package managers.

Advanced Packaging Tool (APT)

The underlying package manager in Ubuntu (or any Debian based Linux) is APT. You can use the command apt to install or remove packages on your system. APT is also used in background in GUI based package managers like Ubuntu Software Center and synaptic.
EDX have a pdf which lists some basic commands to using package managers. Download it here.

What is Source and Binary?

Continue reading Concept of Installing Applications in Ubuntu

The User Experience of using Ubuntu

In previous articles we installed Ubuntu, learned how to use Gnome shell on Ubuntu and customize it as per needs. In this article I would be dealing on some more points which makes it easier to understand the aspects of Ubuntu for those who are still deeply wrapped up in the world of Windows. Then we will learn how you can use keyboard shortcuts to improve the User Experience of using Ubuntu. In the end we will see how you can use built in ways to help yourself if you ever needed to learn more about Ubuntu and Terminal commands.

Philosophy of Linux over Windows

There are a few structural changes one notices when they migrate to Linux based OS like Ubuntu as compared to Windows. Following is a list that explains some of them:

1. Disk System

In Windows each partition of the HDD is referred as Disk1, Disk2 etc. While in Ubuntu it is termed as sda1, sda2. Here sda stands for one physical hard disk. And sda1 stands for Storage Device “A” partition 1 on a single physical HDD.

2. File System Type:

Filesystem is a way for the OS to keep the data on the HDD and a way to access it. Windows user would be familiar with NTFS and FAT32 but on Ubuntu, EXT3 or EXT4 is used primarily while EXT2 and XFS are also common.

3. Drive Naming Convention:

In  Windows people are too familiar with drives named on alphabet like C, D, E and F. It’s the C: drive which is the root drive and where OS is installed. Ubuntu is radically different  where the naming convention is considered.
In Ubuntu, root is a single forward slash. That is, “/“. So suppose I create a directory (another term for “folders”) called home in the root folder. The path for that would be /home.
Due to this convention, the way removable drives are handled is also different in Linux. A CD you insert with label projectone in the CD drive will be “mounted” and can be accessed from say, /media/username/projectone.
Lastly, in Linux, file and folder names are case sensitive. So, /home/user is different from /home/User and /home/USER.

A typical Directory Structure in Linux
A typical Directory Structure in Linux. Image Courtesy: edx.org

Continue reading The User Experience of using Ubuntu

Making Ubuntu Personalized with GNOME

Until now we got familiar with Ubuntu and know how to install updates and softwares, as well as know how to use a few commands using Terminal. And now that we know what is Unity and the Unity bar, it’s time to dump it! Seriously, there are cooler alternatives out there. One such alternative is GNOME. GNOME was native part of Ubuntu until a few versions ago. But Canonical switched it for Unity later. And while Unity may provide a very good shell I don’t think it’s on par with modern era.
In this guide I will install GNOME  and write about how to customize it with extensions.

GNOME:

GNOME shell provides a fully customized UI on top of Ubuntu. Consider a shell akin to a completely new theme in Windows, except, shell is much more than just a theme. It actually is a complete Desktop Environment (DE) and contains completely different and sometimes a unique set of features which other shell lacks.
Unlike Windows, you can  choose to use any DE right before you login from the login page. So while one user might be using Unity, you on the same Ubuntu can use GNOME. I should warn though that GNOME is a little heavy on resources than Unity, but it’s beautiful and that there are some sacrifices which have to be made for “elegance”. Without wasting more time lets just install GNOME and see it in action.
To install GNOME run following command on Terminal (again Ctrl + Shift + T) while entering password when asked:

sudo apt-get install gnome

This will install a bunch of packages (around 500 MBs) which are included in GNOME by default. Continue reading Making Ubuntu Personalized with GNOME

Ubuntu: Updating and Setting up Softwares

In my last article I wrote about my first impressions of freshly installed Ubuntu 14.04 and shared what I knew about Unity interface which Ubuntu comes bundled with. Today I am going to update the OS and install various softwares. You can follow the steps to replicate the same on your copy of the OS or skip a few steps as per your requirements.
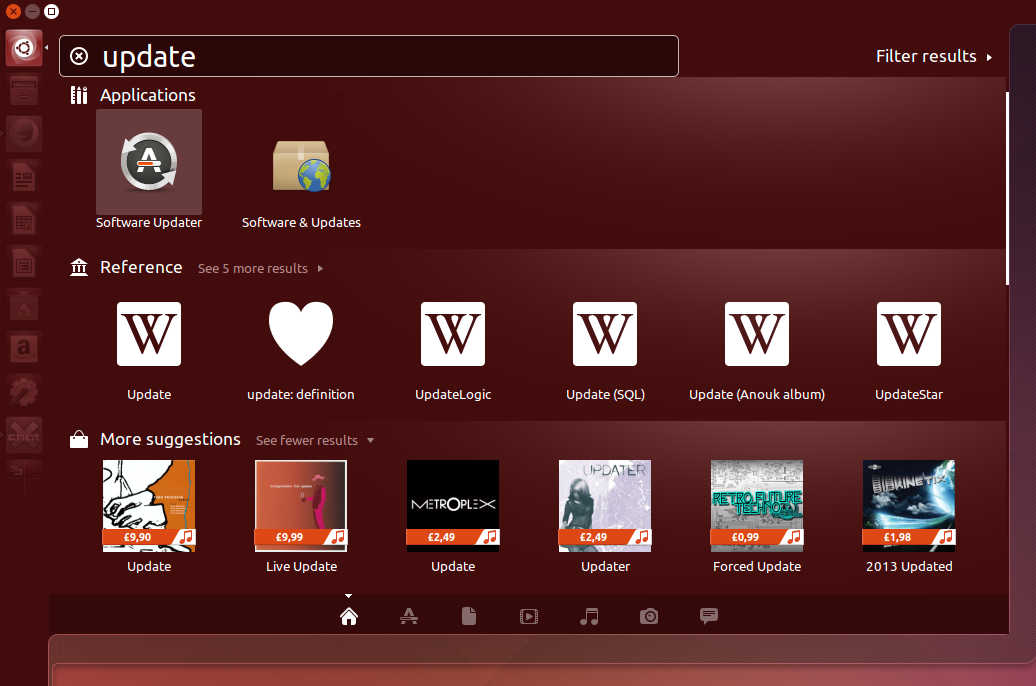
Installing updates is the first thing which one should do after installing a fresh copy of Ubuntu. Updates may include feature enhancement or security bugs. There are two methods to update Ubuntu. For first you can press “Dash Home” button on top of the Unity bar and type update, then select “Software Updater“.

Software Updater
Software Updater
Software Updater Checking for Updates

This would check for updates and give you an option to install the updates right away. But there’s no fun in that. And I on the other hand will use more traditional way to update my OS… Continue reading Ubuntu: Updating and Setting up Softwares