Tag Archives: Technical

How to setup WordPress on Digital Ocean (2020)

With incidents such as Australian bush fire, Covid-19 Pandemic and civil unrest in many countries over one reason or the other, 2020 is basically proving to be one long nightmare. To make it worse for me, my server got hacked, majorly due to lack of proper security or a bad WordPress vulnerability (To put it in the words of Einstein, mildly, human stupidity has no limit).

So I decided to migrate the server to a new one and this time decided to invest some time in making it more secure. This guide is basically a document to setup such a server to host WordPress sites with as much security hardening as I possibly can do. 2020, bring it on!

Continue reading How to setup WordPress on Digital Ocean (2020)

How to secure your site using Lets Encrypt

If you have your own site, encrypting is something that should be mandatory. Not only does it makes your site secure against hackers/crackers but also google rank those sites higher who serve their site on https.
Here’s how you can secure your wordpress based site using certificate provide by Lets Encrypt.

Some background:

I am quoting the following direct from the Let’s Encrypt site:

To enable HTTPS on your website, you need to get a certificate (a type of file) from a Certificate Authority (CA). Let’s Encrypt is one such CA. In order to get a certificate for your website’s domain from Let’s Encrypt, you have to demonstrate control over the domain. With Let’s Encrypt, you do this using software that uses the ACME protocol, which typically runs on your web host.

If you have shell access (that is if you can connect to your host using PuTTY), you can follow the instructions provided here to install certbot.

Process:

Assuming your wordpress site runs on nginx web server on Debian 9, here’s how to do it:
Add the repository source in your sources.list:

deb http://ftp.debian.org/debian stretch-backports main

to your /etc/apt/sources.list (or add a new file with the “.list” extension to /etc/apt/sources.list.d/) Continue reading How to secure your site using Lets Encrypt

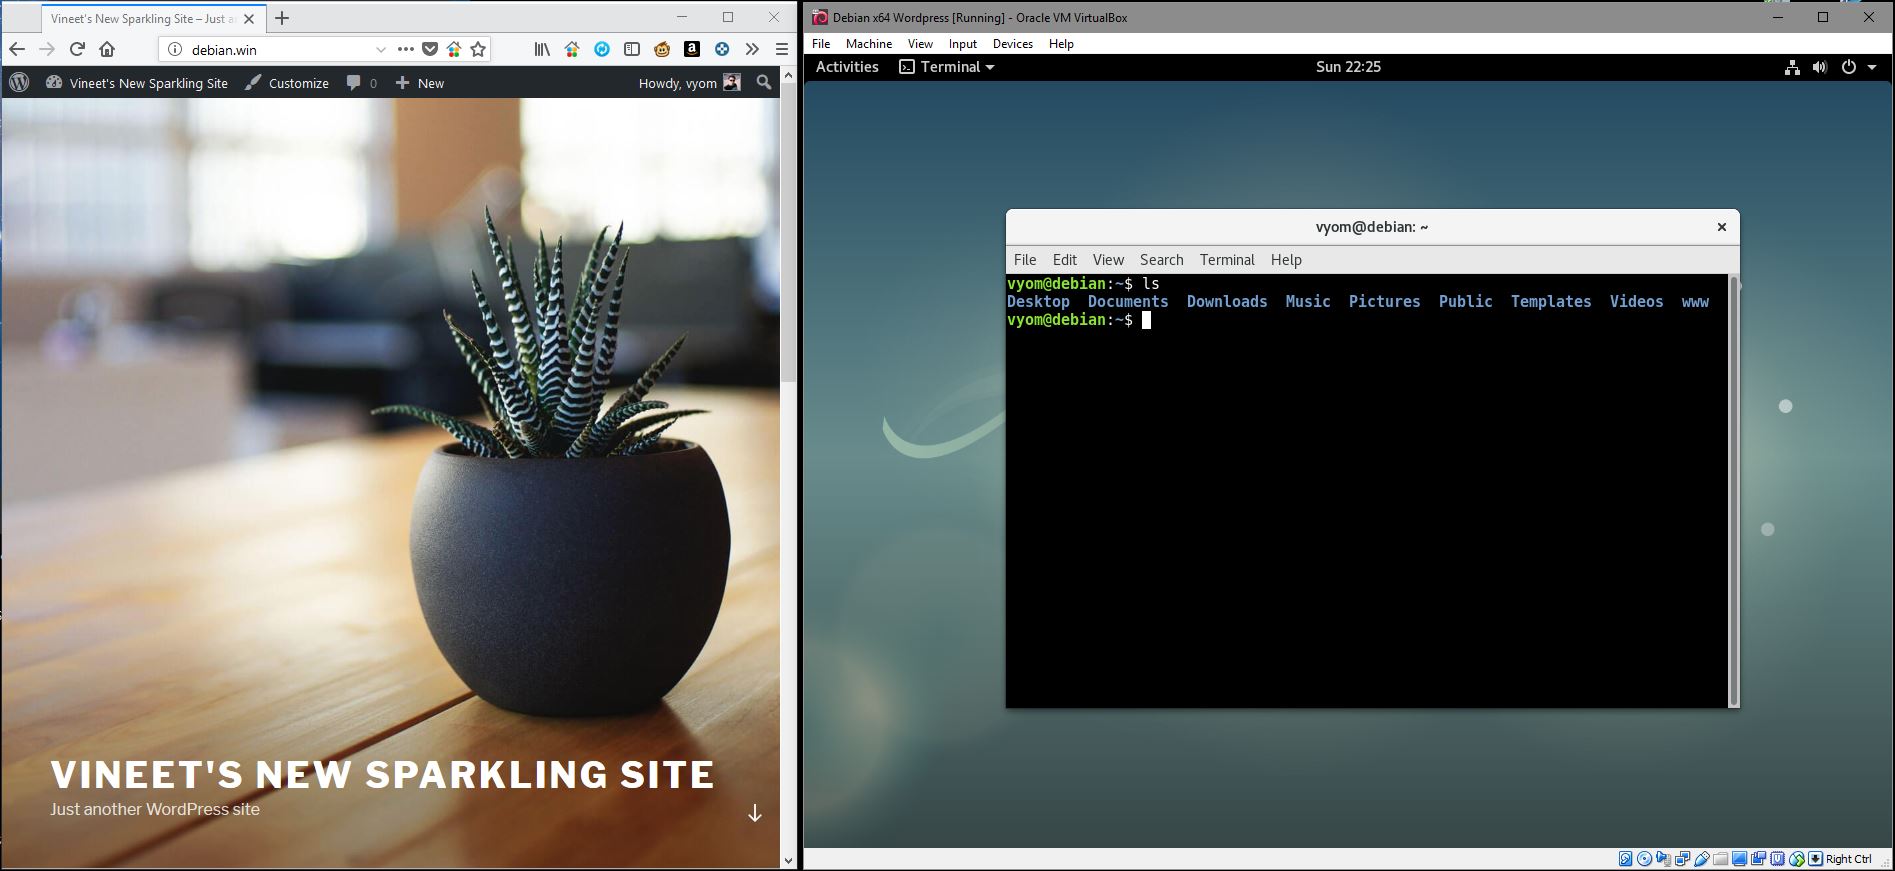
Setting up WordPress on Debian 9.3 x64 on a Virtual Machine on Windows 10

In this article I am documenting the exact steps that one needs to host a wordpress based site on a Debian based virtual machine (VM). I choose debian since that’s one of the preferred distro based on it’s stability and smaller footprint on resources compared to Ubuntu. But you may very well choose Ubuntu, only some steps in below documentation would differ.
This article deals with following technologies:

  1. Windows 10: The host operating system
  2. Oracle VirtualBox: The Virtual Machine software
  3. Debian 9.3 x64: The distro which we will install on the VM
  4. nginx: The web server
  5. mariadb: MySQL database solutions
  6. php: The package which installs on Debian automatically as a dependency
  7. phpMyAdmin: Administration tool for MariaDB

Continue reading Setting up WordPress on Debian 9.3 x64 on a Virtual Machine on Windows 10

Commands to Analyze Space through Terminal

This article lists a few ways to analyze the usage space of the hard disk through Terminal.

Space occupied by all folder sorted ascending order:

sudo du -h * | sort -h

The command ‘du’ is used in terminal which stands for disk usage. But the command alone gives listing of all files along with their size. The above command sorts the list, so that the highest space folder appears in bottom of the list. SUDO added since if you want it to run in root folder, normal command won’t have access to system folders.

Space on disk:

df -h

Above command is not path sensitive, which means you can run it from anywhere and also don’t require sudo.

Disk space usage per user:

sudo find . -printf "%u %s\n" | awk '{user[$1]+=$2}; END{ for( i in user) print i " " user[i]}'

Above script (combination of commands) prints disk usage per user and is not path sensitive. The script uses find and awk (extraction command) to give a list of users along with the space they are consuming in bytes.

Viewing first top directories taking space

du --max-depth=1 2> /dev/null | sort -n -r | head -n20

The above command would list top few directories along with their size, sorted in descending order.

Third Party Utility:

On debian, install ncdu by following command:

sudo apt-get install ncdu -s

Once install, you can use the utility ncdu to easily see the size of various folders through a friendly user interface right within Terminal. Here’s the ncdu manual: https://dev.yorhel.nl/ncdu/man
If above command don’t install ncdu try forcing the install by following command:

sudo apt-get install -f -y ncdu

With above command you can pin point the folder which is taking up space in little time. Also note that the sometimes you need to go deeper by using the command, sudo su, to view space of files taken up by say, /var directory.

Steps to add a WordPress Site to an existing VPS

I use to have a hard time configuring a new site under a common VPS. So I decided to document the steps for easy reference in future.
Following are the steps to add a new site “site-name.com” under a new user account “username” on your Linux VPS. This is to note that this works if you have the following web service solution stack (LAMP):
Linux OS : Debian
Web server: Nginx (Not Apache)
Database: MySQL
Application Programming Language: PHP
So here we go:
1. Buy the domain. Call it site-name.com.
2. Set the nameserver of the domain to point to the IP address of your VPS under ‘A’ record which stands for ‘Address’. For reference, there are other kinds of record like ‘CNAME’ and ‘MX’, but you don’t need to set them at this point.
3. Create a new user on VPS by command by following command.

sudo adduser username

This command also creates a new home directory for the user.
Continue reading Steps to add a WordPress Site to an existing VPS

Stuff I do in Windows that needs an alternative in Linux

In my previous post I said I would be looking an alternative in Linux for everything I do in Windows. Here’s an initial list of the applications that I am finding an alternative to. I would be updating this post fairly regularly, adding more things to the list and their alternatives, until I am confident that I can plan to make Ubuntu as my primary OS.
 

Softwares Type Alternative in Linux
Which have Nix versions
Firefox Browser Firefox
F.lux Screen Dimming app F.lux
Dropbox File sharing Dropbox
Telegram Chat application Telegram
VLC Player Video Player VLC
Steam Gaming software Steam
Which have no Nix Versions
Garena Gaming LAN client NA
Raptr Gaming Client NA
Which have good alternatives
uTorrent Bit torrent application Transmission
Everything Real time file search Locate command in Terminal
Nettalk IRC Client XChat
Microsoft Office Picture Manager Picture editor Shotwell or GIMP
Wordweb Dictionary GoldenDict
Netmeter Record of consumed bandwidth Conky comes closest
IDM Download manager uGet
Google Talk Google chat application EmpathyIM
Winamp Music Player Rhythmbox or Banshee
MS Office Office Suite LibreOffice or Wine
Where no alternative is needed
BullZip PDF Printer Not Needed since ubuntu have built-in PDF Printer
PuTTY SSH and Telnet Client ssh and telnet command on Terminal
FileZilla FTP Client ftp command in Terminal
Code::Blocks C, C++ Programming IDE Use GCC from Terminal or Emacs
To Be Decided
MS-Paint Pixel level bitmap picture editor

Apart from the applications, there are other things which a particular Windows user gets adapt to:

  1. Custom Keyboard Shortcuts: As per current info it’s possible to set custom Keyboard Shortcuts in Nix easily.
  2. Ability to create apps shortcuts:
  3. Background apps and a System Tray:
  4. Window Switching: From what I know now, switching in Nix is cooler and more functional than windows. Shortcut to use it is “Home key” + “W”.
  5. Autostart Apps: Ability to let the apps start automatically  when OS boots by putting the app in something called as StartUp folder.

When the softwares and UX is sorted out next thing which comes is understanding some lingo of Nix which might be totally unfamiliar to newbies in Linux:

  1. Filesystem: Nix don’t have the concept of Drives like C, D or E. Rather everything in Nix starts from the root. “\” is root folder. Hence path to your home folder can be, “\home\vyom” which means “vyom folder inside home folder of root folder”.
  2. Mounting of drives: Any DVD or removable USB drive you insert is mounted to some folder inside root folder. <insert example>.
  3. Installing Apps: Nix don’t have .EXE files rather it have various ways to install apps.
    • apt-get install <softwarename>
    • TAR Packages

Expect revision to this post to reflect new information soon.

I migrated to Digital Ocean

It was about one year that this site was hosted on a VPS server of Leaseweb. They provided a good set of specs but had some amount of unreliability when it came to providing 24×7 up-time. Also it once had a service outage that resulted in the loss of our data. Thanks to offline backups and Google cache I was able to restore all my posts. So it was high time before we moved onto something more trustworthy. It was then when I came to know about Digital Ocean, an SSD only VPS hosting provider. After a lot of geeky research I realized how quickly they grew their scope to provide a quality platform for VPS.
What follows next in this article is the story of how I migrated to DigitalOcean with help from my friends. Be warned that this article is fairly technical and can also serve to anyone who wants to migrate to DigitalOcean. I wholeheartedly thank Aaruni for his help on setting up the server, without his help it could have taken me days to do the same.

1. New Server on DigitalOcean (DO) VPS

There are numerous VPS providers but none at the feature to price ratio which DO provides. Hence me and my online friends decided to go for the most basic plan of $5 per month, which provided us with following features:

  • 512MB Memory
  • 1 Core Processor
  • 20 GB SSD Disk Space
  • 1TB Transfer Bandwidth

This configuration is modest to run a Unreal Tournament (UrT) gaming server and to host numerous small websites which were our requirements. Plus its easy to upscale so starting from the smallest option seemed to be a wise decision.
Continue reading I migrated to Digital Ocean

Installing Ubuntu Touch on your rooted Nexus 7

If you haven’t rooted your Nexus 7 yet, you can follow my previous post and do that easily. This guide assumes you have connected your device with your PC and can use ADB to push commands over to your device. If this doesn’t make any sense, read my previous guide.
In this post I am about to write how can you easily install Ubuntu Touch on your Nexus 7. Before we do that, you can read this article on why shouldn’t install Ubuntu Touch: 4 Reasons Why You Shouldn’t Install Ubuntu Touch on Your Nexus | OMG! Ubuntu!
But since we are dual booting the Ubuntu with Android, the reasons stated above won’t matter!
1. Installing Custom Recovery (Flashing TWRP Multi ROM)
Using adb commands the next you need to do is to flash a version of TWRP recovery which is tweaked for MultiROM support. The file I downloaded was “TWRP_multirom_grouper_20131022.img” from here: [MOD][OCT 22] MultiROM v16a (fix SuperSU for secondary ROMs) – xda-developers, and used following command to flash it.
fastboot flash recovery d:\path-to-recovery\TWRP_multirom_grouper_20131022.img
Continue reading Installing Ubuntu Touch on your rooted Nexus 7

Rooting Nexus 7 and Unlocking Bootloader

In my previous post I posted a few screenshots of my new Nexus 7 which I bought recently. In this post I am going to write about how you can unlock the bootloader of your Nexus 7. This process can be basically done in 5 steps.
Rooting the N7:
You can live your life with N7 without rooting it. But as one of the Android Commandments say: “Thou shalt not use thine nexus unrooted” I think you need to be awesome instead and do unlock it to get these features to work:
1. Ability to use an OTG cable to connect pen drives to the device, thereby overcoming the 16 GB (13 GB available actually) limitation.
2. Using a 3G dongle to let your device take advantage of 3G (which by default this device don’t have)
3. Take advantage of apps that only works when device is rooted, like Titanium Backup and Cache Cleaner
4. Flash custom ROM’s and/or Install Ubuntu Touch on your device (and be a part of an OS in the making!)
You can read this article that echoes my thoughts, until the part where he used a toolkit to root (I rooted the old fashioned adb way).
Here’s How to Root the Nexus 7 – But Should You? | Android.AppStorm
Anyway, so how actually you root N7?
You can use the most popular Nexus Rootkit to do all kinds of stuff to your N7 including Rooting, flashing zips etc, but if you are geek like me, here is how to do it manually (and its way easier than you think):
Continue reading Rooting Nexus 7 and Unlocking Bootloader